I like buffing sparkly bits. My Mountain Goat blog is here: http://mountaingoatmtb.blogspot.com/
Tuesday, November 27, 2012
Monday, October 08, 2012
Barbara got a spiffy new iPhone 5 last weekend. The last few days have seen deteriorating call quality, that's sporadic, but at times it's frequently so bad that it makes the phone unusable. She went back to her carrier, Verizon today, who basically told her that it was how she was holding it, and that was interfering with the antenna!!! BS that smacks of antenna-gate a few years ago with the launch of the iPhone 4.
Anyway, to help her out a bit I went online, and searched "iPhone 5 reduced call quality". The first link took me to just one Apple forum, where there was already 15+ pages of disgruntled iPhone 5 owners, all on Verizon, who were having the same issues.
Thursday, September 13, 2012
Friday, August 31, 2012
Sunday, July 15, 2012
Tuesday, May 01, 2012
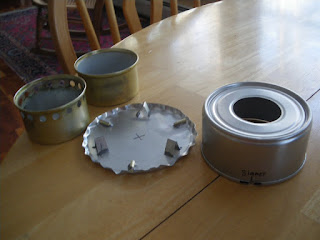
Ornate simmer top for alcohol stove...
Having solved most of the technical issues with my alcohol stoves, I then decided to try my hand at a little ornamentation.
Here's my first attempt at a "Universal Theme", Moon, Sun, and the blackness of space. It's also a good way of covering that irksome serial code that appears on every cat food can, sometimes in more than one position.
The letter "N", my initial, I carved out of a piece of Abalone shell. As it's the only thing made of a non-metal I'll be interested to see if it holds up to the temperatures generated.
Thursday, March 29, 2012
Working with very fragile materials...
That's a ring of aluminum Miller beer bottle, on the end of a steel cat food can for support. Fits perfectly, and is very supportive.
I make simmer rings this way.
I make simmer rings this way.
Tuesday, March 27, 2012
Rolling an edge into a blind hole in a Fancy Feast can...


Figured out how to achieve what I wanted.
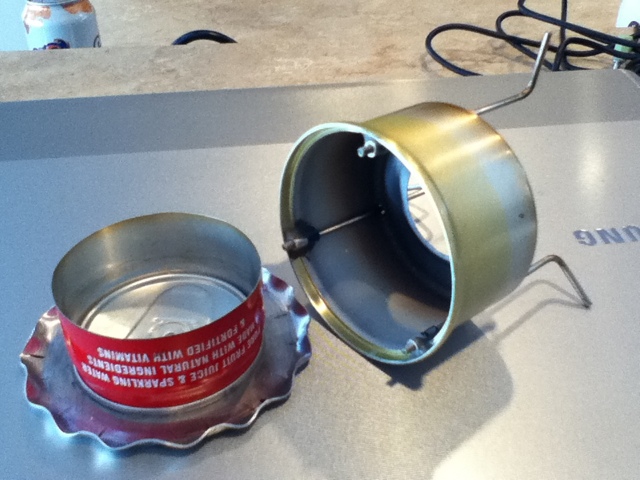
Take a Fancy Feast can. Open a small hole in the bottom of the can, and "remove" the contents (I use the non-business end of a spoon). Feed to Lovie or Minnie-Moo. Wash out the can...you now have an intact FF can: the pull-ringed top is still attached to the can.
I use a Dremel and a sanding disk to smooth the edges of the hole to about seven eight's diameter, finish the edge with fine emery paper so there are no nicks or blemishes in the edge. Blemishes will start cracking if present during the next steps.
Make yourself a tool like I show. I used the stainless steel mounting hardware for a bicycle rack. You need something that's quite a bit stronger than the thin-walled aluminum can, and fairly small sectioned as you will eventually need all the probing power and clearance possible when working the can edge to vertical.
Go slowly around the edge of the can in small steps, gradually creating an edge that rolls inwards towards the top of the can. I found that about three passes worked well, in steps of 30, 60 and finally 90 degrees. Take your time, and resist the temptation to do it in just two passes (helps prevent cracks in the edge if you roll in gradually).
Saturday, March 17, 2012
Two two-way stoves...
The squatter stove is made from Arizona iced tea cans, the other from Miller lite bottles.
Both work with a pot stand to boil, or just place the pot directly on the stove itself and they become simmer stoves.
Both work with a pot stand to boil, or just place the pot directly on the stove itself and they become simmer stoves.
Thursday, March 01, 2012
Video of my homemade twist to simmer stove in action...
It's really hard shooting a video, doing a voiceover, and adjusting a hot stove all simultaneously ;-)
Stove with lots of self control...
Use it without any attachment and it boils fast. Put on the snuffer plate, and the stove switches to a low simmer (flame now comes out of the side holes instead). Or put on the simmer ring and adjust the central flame incrementally.
Also, a shot of the snow outside. See most of the stoves I have made so far on the window ledge.
Also, a shot of the snow outside. See most of the stoves I have made so far on the window ledge.
Wednesday, February 22, 2012
Three ouncer, Brasslite homage....
Fancy feast can, Red Bull type inner. Simmer control via leg adjustment, also via simmer ring. A tea light candle fits perfectly too!!
Boils fast. Perfect flame.
Boils fast. Perfect flame.
Thursday, February 16, 2012
Latest stove...twist to simmer...
Fully adjustable simmer from 0 to 100%, just twist to set. Removable pot stand legs. Interchangeable internal fuel chamber can be swapped for different containers permitting differing heat outputs/faster boil times/lower simmers. Primer base built in to the stove. Additional simmer plates can be used for extreme flame control.
Construction hours??? Don't ask ;-)
Construction hours??? Don't ask ;-)
Monday, February 13, 2012
Alcohol backpacking stove with continuously variable simmer control...


The latest in a long line of prototypes.
Maybe the most difficult stove to make so far, it's especially difficult achieving the accuracy of construction that this application of simmering control demands.
Each spoke leg/simmer control/pot stand support screws out (from a baseline that is the end of the spoke being level with the bottom of the larger can)eight full turns. This gives a degree of simmer from 100% down to 0%. Additionally, a simmer ring can be placed on top of the stove.
The stove permits fast swapping of the inner 3 ounce can for other cans with different hole configurations punched into them, giving a tremendous variation of heat output.
The only real drawback to this design is that the simmer control needs to be done with the larger can/spokes not hot. Otherwise, you'd need heat-resistant gloves to turn the very hot spoke ends. In other words, the degree of simmer has to be set before the stove is lit. I am currently working on a design that will permit real-time adjustment, even with the stove roaring.
Four different stoves. All using cat food cans.
Saturday, February 11, 2012
Wood-Gas stove...


A clone of the Bushwhacker, with a small add-on to enable flame control. Made out of a quart paint can, a 29 ounce tomato can, some hardware cloth, and a 19 ounce Progresso Soup can for the fire container.
The flame control ring has holes in it which exactly match the vent holes in the paint can. Turn the paint can a small amount and the holes are either exposed or closed, or somewhat in between.
Everything nests within the paint can for storage, including the pot support.
Friday, February 10, 2012
Backpacking baking attachment...


I found locally the perfect bowl that fits exactly/perfectly inside my MSR 1.1 litre pot ( thus will fit anything larger too), and constructed a air-gap spacer for the bottom out of a spoke (it's actually a very short tripod).
The greatest thing too, is that the inner bowl is a very useful size for backpacking in its own right: it's 5.375 inches in diameter by 2.5 inches deep, with a small lip, and a very small lower radius between the wall and the base. This makes it useful as a soup/cereal bowl, or to have a side dish in. The bottom is flat, so it'll sit on any stove well if used by itself, and the gauge of it is exactly the same as my MSR pot, and it's stainless!!!
I decided to drill it around the rim for 2 reasons:
1...the holes allow a little more airflow, and thus temperature equalization.
2...in 2 of the holes I screwed small screws and nuts. As the pot is such a perfect fit, it's nice to have something to hold on to to extract the baked goodies afterwards.
Monday, February 06, 2012
Modular Alcohol stove, with simmer adjustment...


Been fiddling around making lightweight alcohol stoves lately. It's become a consuming addiction.
Anyway, the latest creation is a stove made principally from a Friskies can, and in to the modular base you can insert a variety of Fancy Feast cans, which can give various burn properties based on the hole configurations punched into them.
Priming plate is built in, though the stove needs very little priming.
Lastly, I devised a way of minimizing or maximizing the air flow to the stove by way of a simple twist of the Friskies can relative to the base. This gives a steady simmer when closed, full blast when open.
One can also use a variety of simmer plates on the top of the stove too, giving even more granular flame control.
Weight is 35 gram. Boils a pint of 55 degree water in about 4 minutes 20 secs in my basement with no wind. Flame is very uniform and even, burns clear on both high and simmer.
Friday, February 03, 2012
Monday, January 30, 2012
Home made alcohol stove and stand
Been developing a home made alcohol stove lately. Made from old cans and a little secret sauce. Boils a pint in about 4.5 mins in my basement, using Heet or denatured alcohol. The stand is built in, but I show it with a stand I made for my Trangia and other home made stoves. Droppers are from RiteAid.
Monday, January 09, 2012
Subscribe to:
Comments (Atom)


